Flash Grbl firmware on Shapeoko controller board.
This is an attempt to explain how to upgrade Grbl firmware on a Shapeoko controller board. Steps should be similar for others also like Nomad etc.
There are 2 routes you can take from this article, all download links will be listed below and step by step on both methods.
- Download XLoader, and the pre-compiled .HEX file and flash.
- Download Grbl source, Arduino software, Update a few configurations, compile and flash.
You are probably asking yourself why choose option #2, it's so much more complex?
Here are a few reasons:
- You will learn something.
- If a new version comes out, you don't have to wait for someone to compile the .HEX file for you as I have done this time.
- It may interest you in being able to review how the code works internally, and you can fine tune certain things within the code!
Before you start EITHER option, connect to your current machine and in the log save the results of issuing the $$ command! You will need to update all of those after the flash back to the settings. Ok, since we all choose option #2, we can skip #1 and review it at the end.
For option #2 download the following:
- GRBL source code- Visit: https://github.com/grbl/grbl and click on (Clone or Download)
- Arduino Studio software- Visit: https://www.arduino.cc/en/main/software click Windows Installer link on right.
Step 1, install the Arduino software first. (You can follow instructions n their website if need be but it's fairly straight forward install.)
Step 2, Extract the .zip file with the GRBL firmware in it.
Step 3, Go to where you extracted the GRBL files and navigate into the grbl folder. Use your favorite text editer (I like Notepad++ or UltraEdit but notepad works just fine as well) to open the file named config.h
Inside there a few lines down look for this section:
// Define CPU pin map and default settings.
// NOTE: OEMs can avoid the need to maintain/update the defaults.h and cpu_map.h files and use only
// one configuration file by placing their specific defaults and pin map at the bottom of this file.
// If doing so, simply comment out these two defines and see instructions below.
#define DEFAULTS_GENERIC
#define CPU_MAP_ATMEGA328P // Arduino Uno CPU
Change the line #define DEFAULTS_GENERIC to read:
#define DEFAULTS_SHAPEOKO_3
(This sets the pins to the correct pins based on the controller layout. Very important! If you want to see what settings are setup you can read the settings in default.h file and the individual pins in cpu_map.h file.)
Step 4, Save the file!
Step 5, find the location of your arduino software. You can probably right click the icon on the desktop choose properties and click the button labeled "Open file location".
Most likely it is installed here: "C:\Program Files (x86)\Arduino"
Open that location up, and in there you should see a folder called libraries. Go into that folder and in there paste the entire grbl folder (the one with the extracted and edited files) into here.
Now if all was done correctly open Arduino Software and you should be able to go to File -> Examples ->grbl -> grblUpload
Now to flash, you will need 2 people or fast hands and be able to reach the controller board and the computer at the same time! Take off the cover to the controller.
You may need to move the capacitor out of the way first, to get to the "PROG" button. See pictures below.
UPDATE: (You don't have to do this if you have limit switch on the Z axis. Instead of holding down PROG key, simply hold the Z axis limit switch while programming. I just learned this!!)
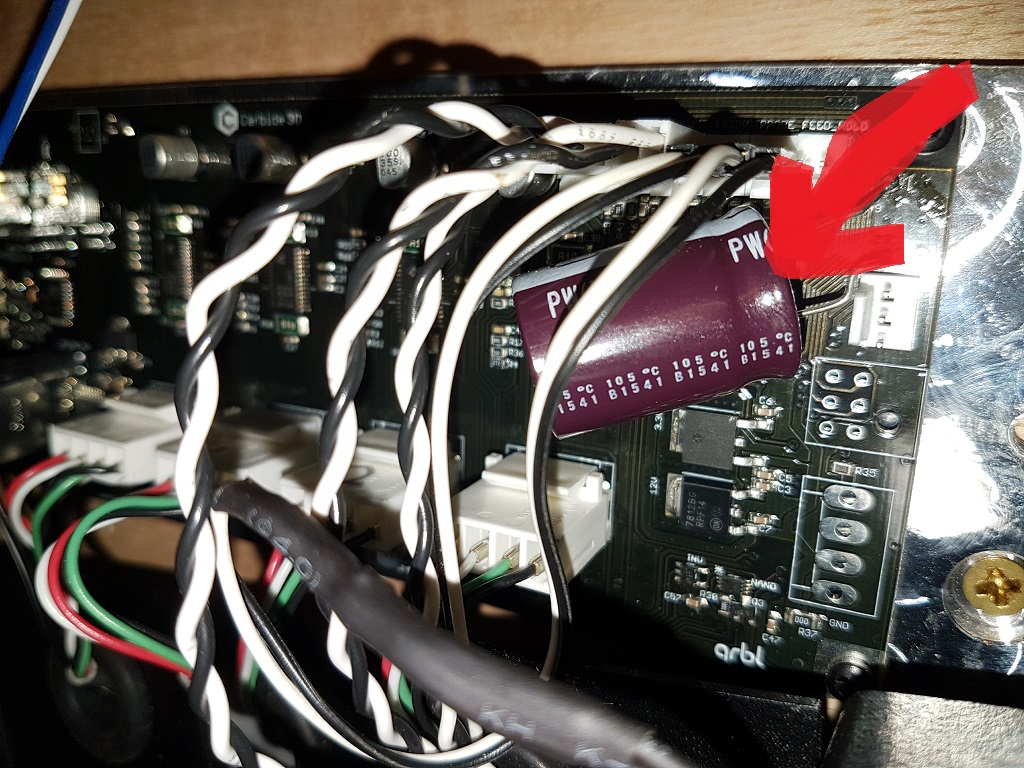
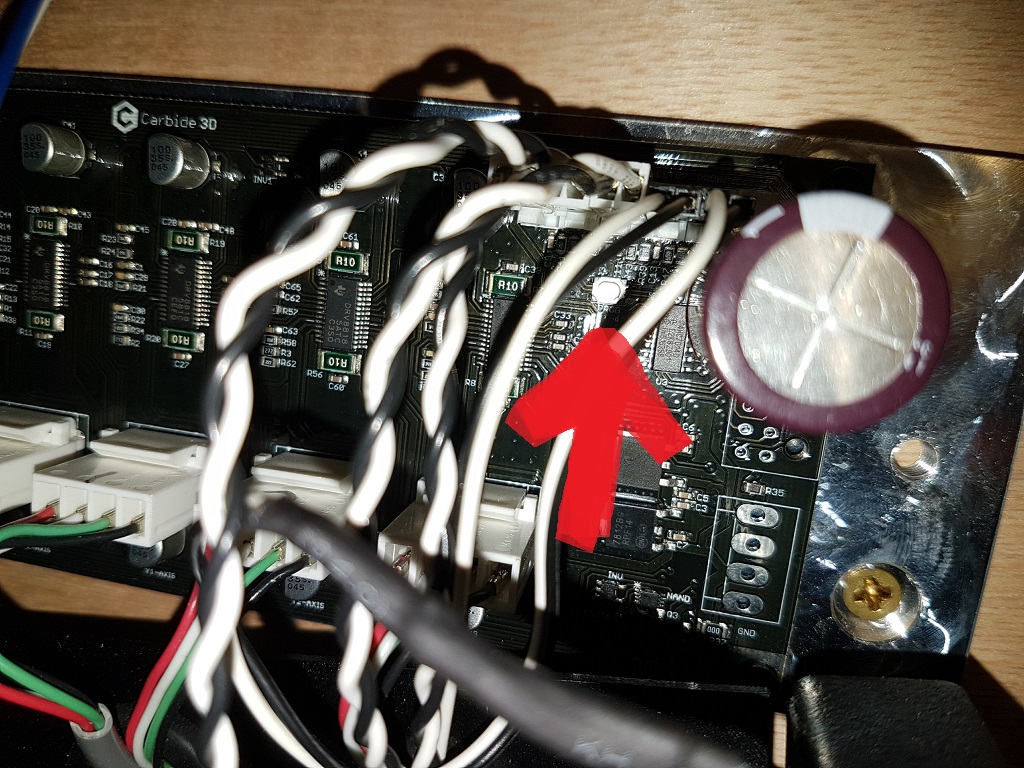
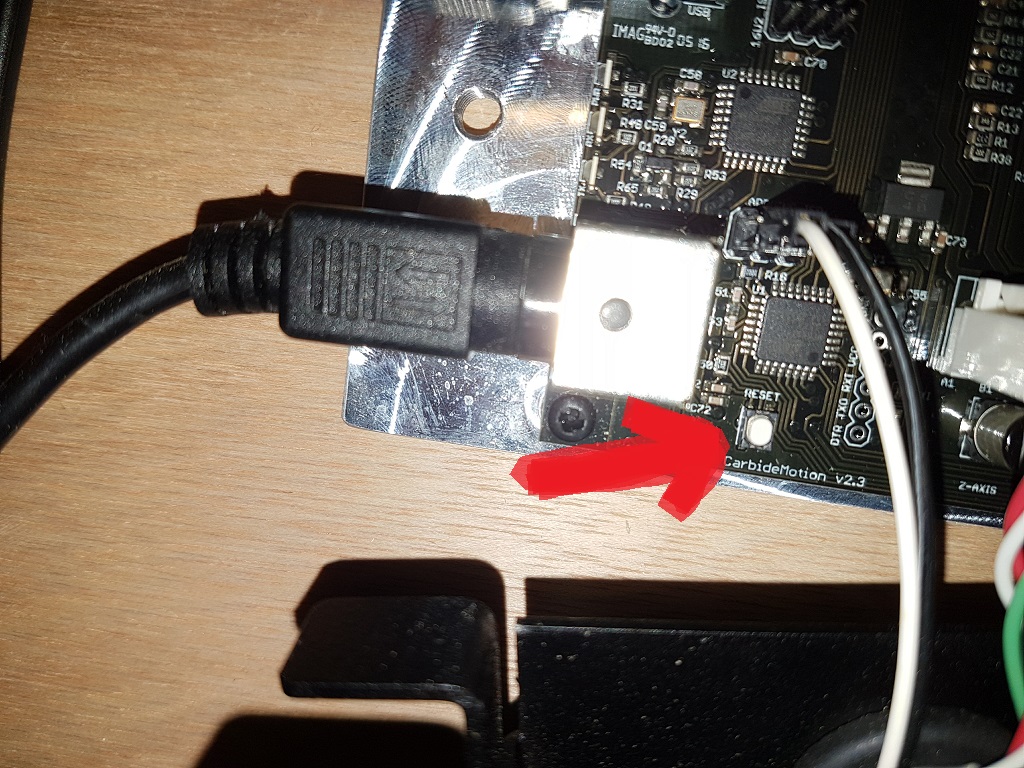
Ok you should be able to see one button above called "PROG" and on the other end of the board there is another called "RESET" see picture below.
****In Arduino IDE, make sure you select the correct serial port, and also select the Arduino /Genuino Uno for the board (Both are on the Tools Menu on the top).
Ok with the buttons located here is the sequence:
Push and HOLD the PROG key.
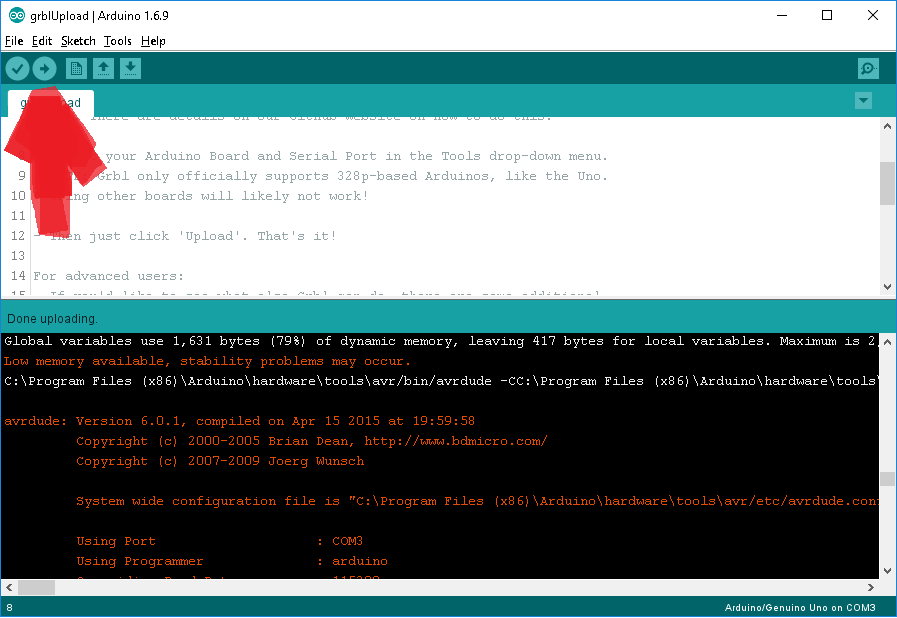
In Arduino software click the button that looks like an arrow pointing to the right see below...
Then quickly push the reset button on the board (Keep holding the PROG key)
When Arduino software says done uploading you can release the PROG key and the upgrade is completed!
Congratulations now open up the serial monitor make sure it's 115200 and update all of the $$ commands from the values you saved first.
To use XLOADER
Download that here: http://xloader.russemotto.com/
Download the .HEX file I compiled for my machine: Hex File
Open XLoader and select the correct port, and browse to the hex file you downloaded above.
Push and HOLD the PROG key.
In XLOader push upload.
Then quickly push the reset button on the board (Keep holding the PROG key)
When XLoader says done uploading you can release the PROG key and the upgrade is completed!
Congratulations now open up the a serial monitor make sure it's 115200 and update all of the $$ commands from the values you saved first.